

Have you noticed that weaving is suddenly popular again. I feel like I am seeing woven looks everywhere, in fashion, stationary, home decor.
The other morning whilst eating my breakfast, I suddenly thought, why not weave paper? I remembered doing it in Primary School, but had never tried to incorporate the technique into my crafting.
I was so excited that I actually made a start whilst on my lunch break (if you look closely you might see my fried rice in the background of these photos.) I was inspired to try a chevron weaving, so I googled paper weaving and found this page of great patterns, including one that fitted perfectly (at the bottom left of the page).
If you would like me to email a copy of the pattern I used just let me know.
Supplies:
2 sheets of paper (as described below)
Masking tape/ other tape that is easy to remove
Craft knife
Steel Ruler
Cutting Mat
Trimmer
To do the weaving you need two pieces of paper in contrasting colours, without too much pattern. I chose these two from the Kaleidoscope range by Stampin'Up!, however I think that the In Colour Paper ranges would be perfect as they are lightly patterned in colours that look great together!
I used 12" square paper, any paper can be used, but keep in mind you will loose at least 1cm of both sides and 2cm off the bottom once you have finished your weaving,

One piece of paper needs to be sliced 1cm strips. If you have a trimmer now is the time to bring it out! You will not I have done this with the turquoise print.
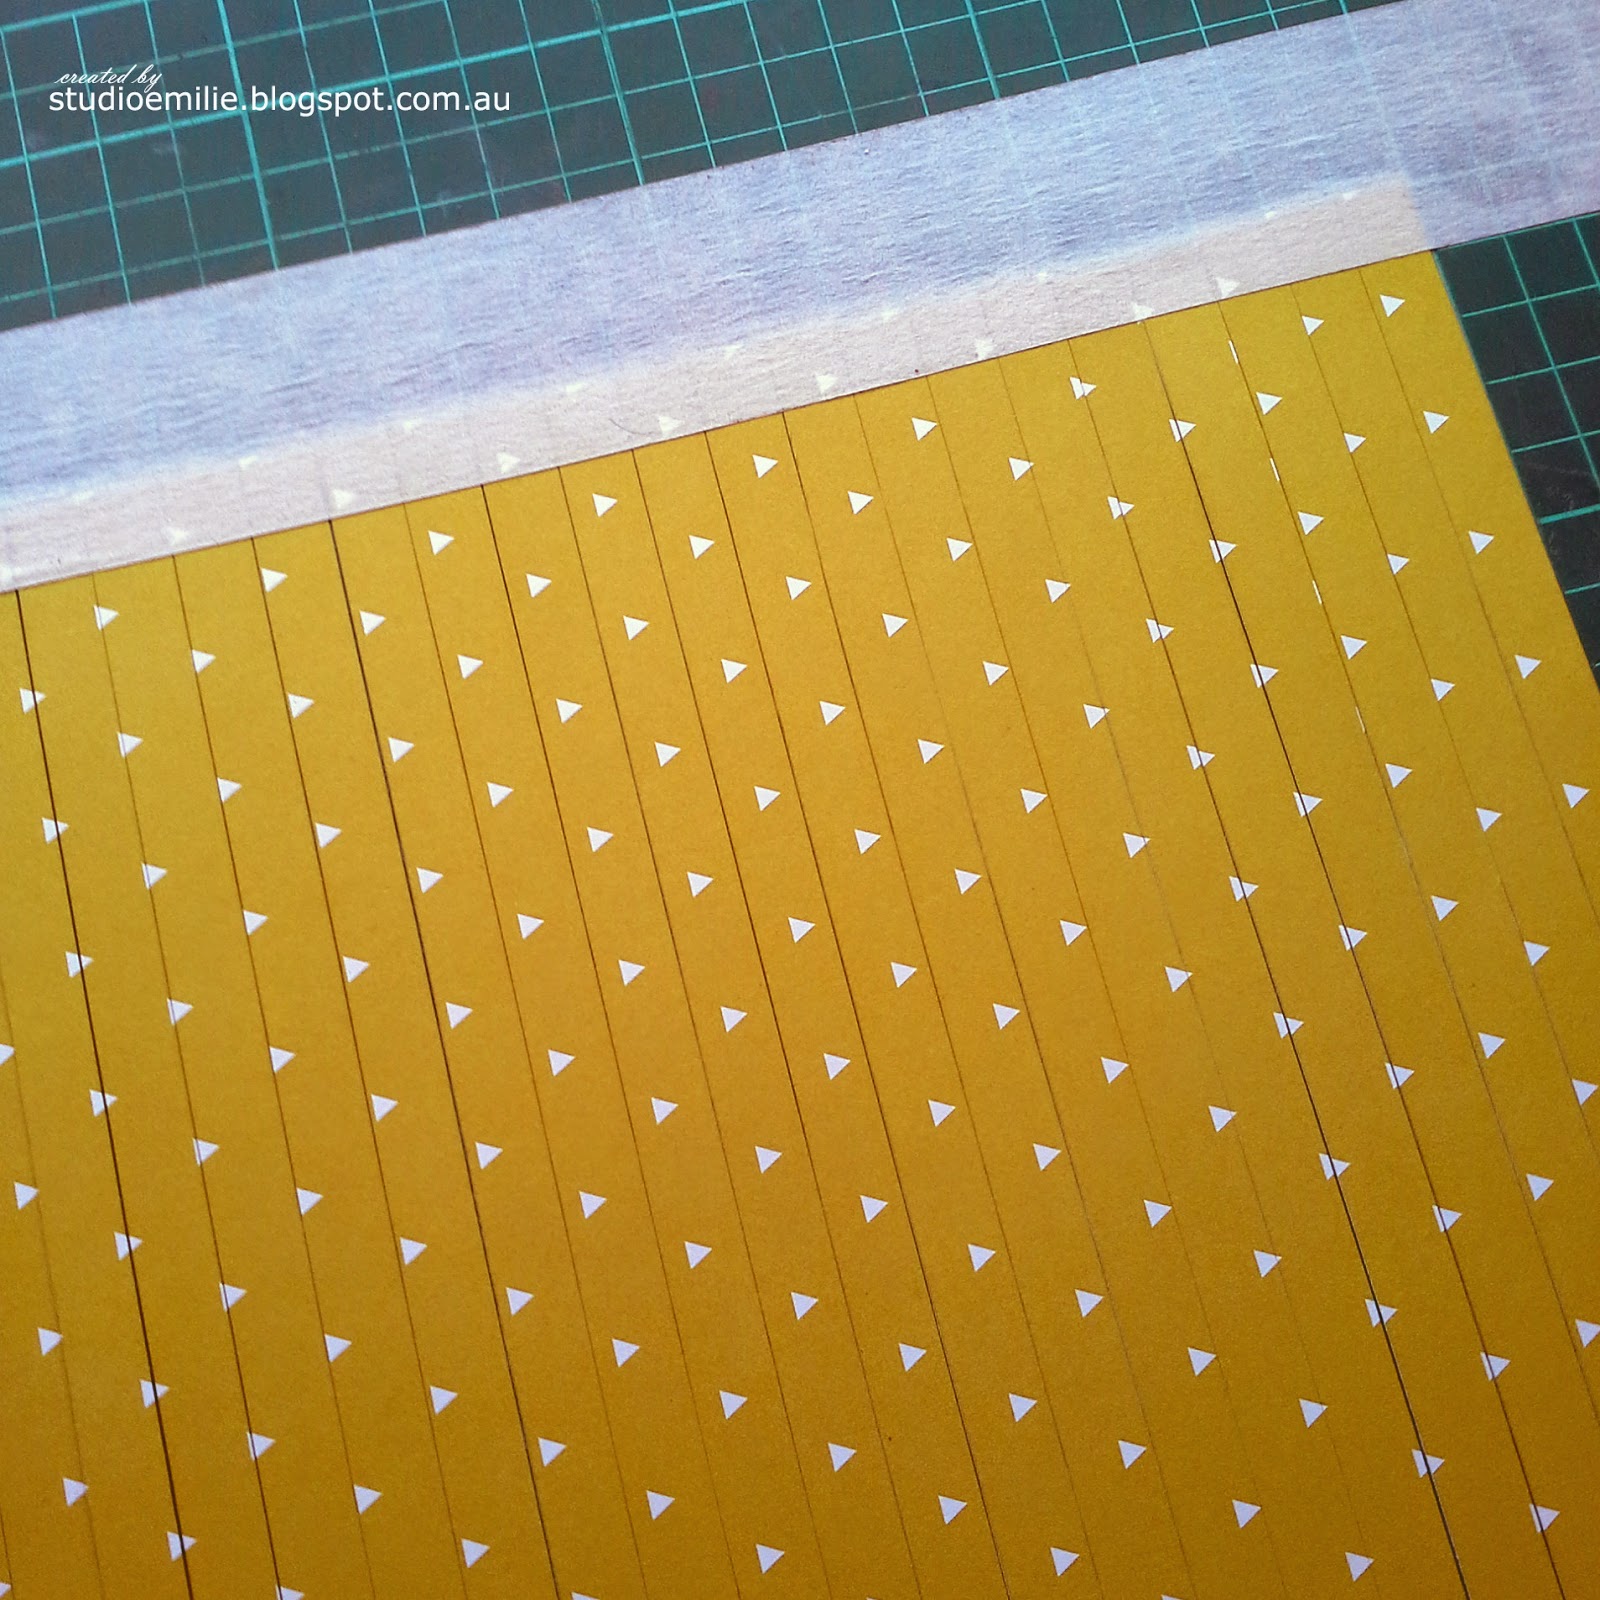
The other piece (in my demonstration it is yellow) needs to be sliced into 1cm strips but stop 1cm from the top of the sheet (it will look a bit like a long fringe) You will probably need a craft knife and steel ruler for this step, however a trimmer can be used instead.


Use masking tape to attach the 'fringe' piece to your craft mat. Tape it 1cm down, with the sliced strips running vertically.
I use masking tape as it is easy to pull off the craft mat at the end. You could use washi, or regular selotape, but it will be more difficult to remove.


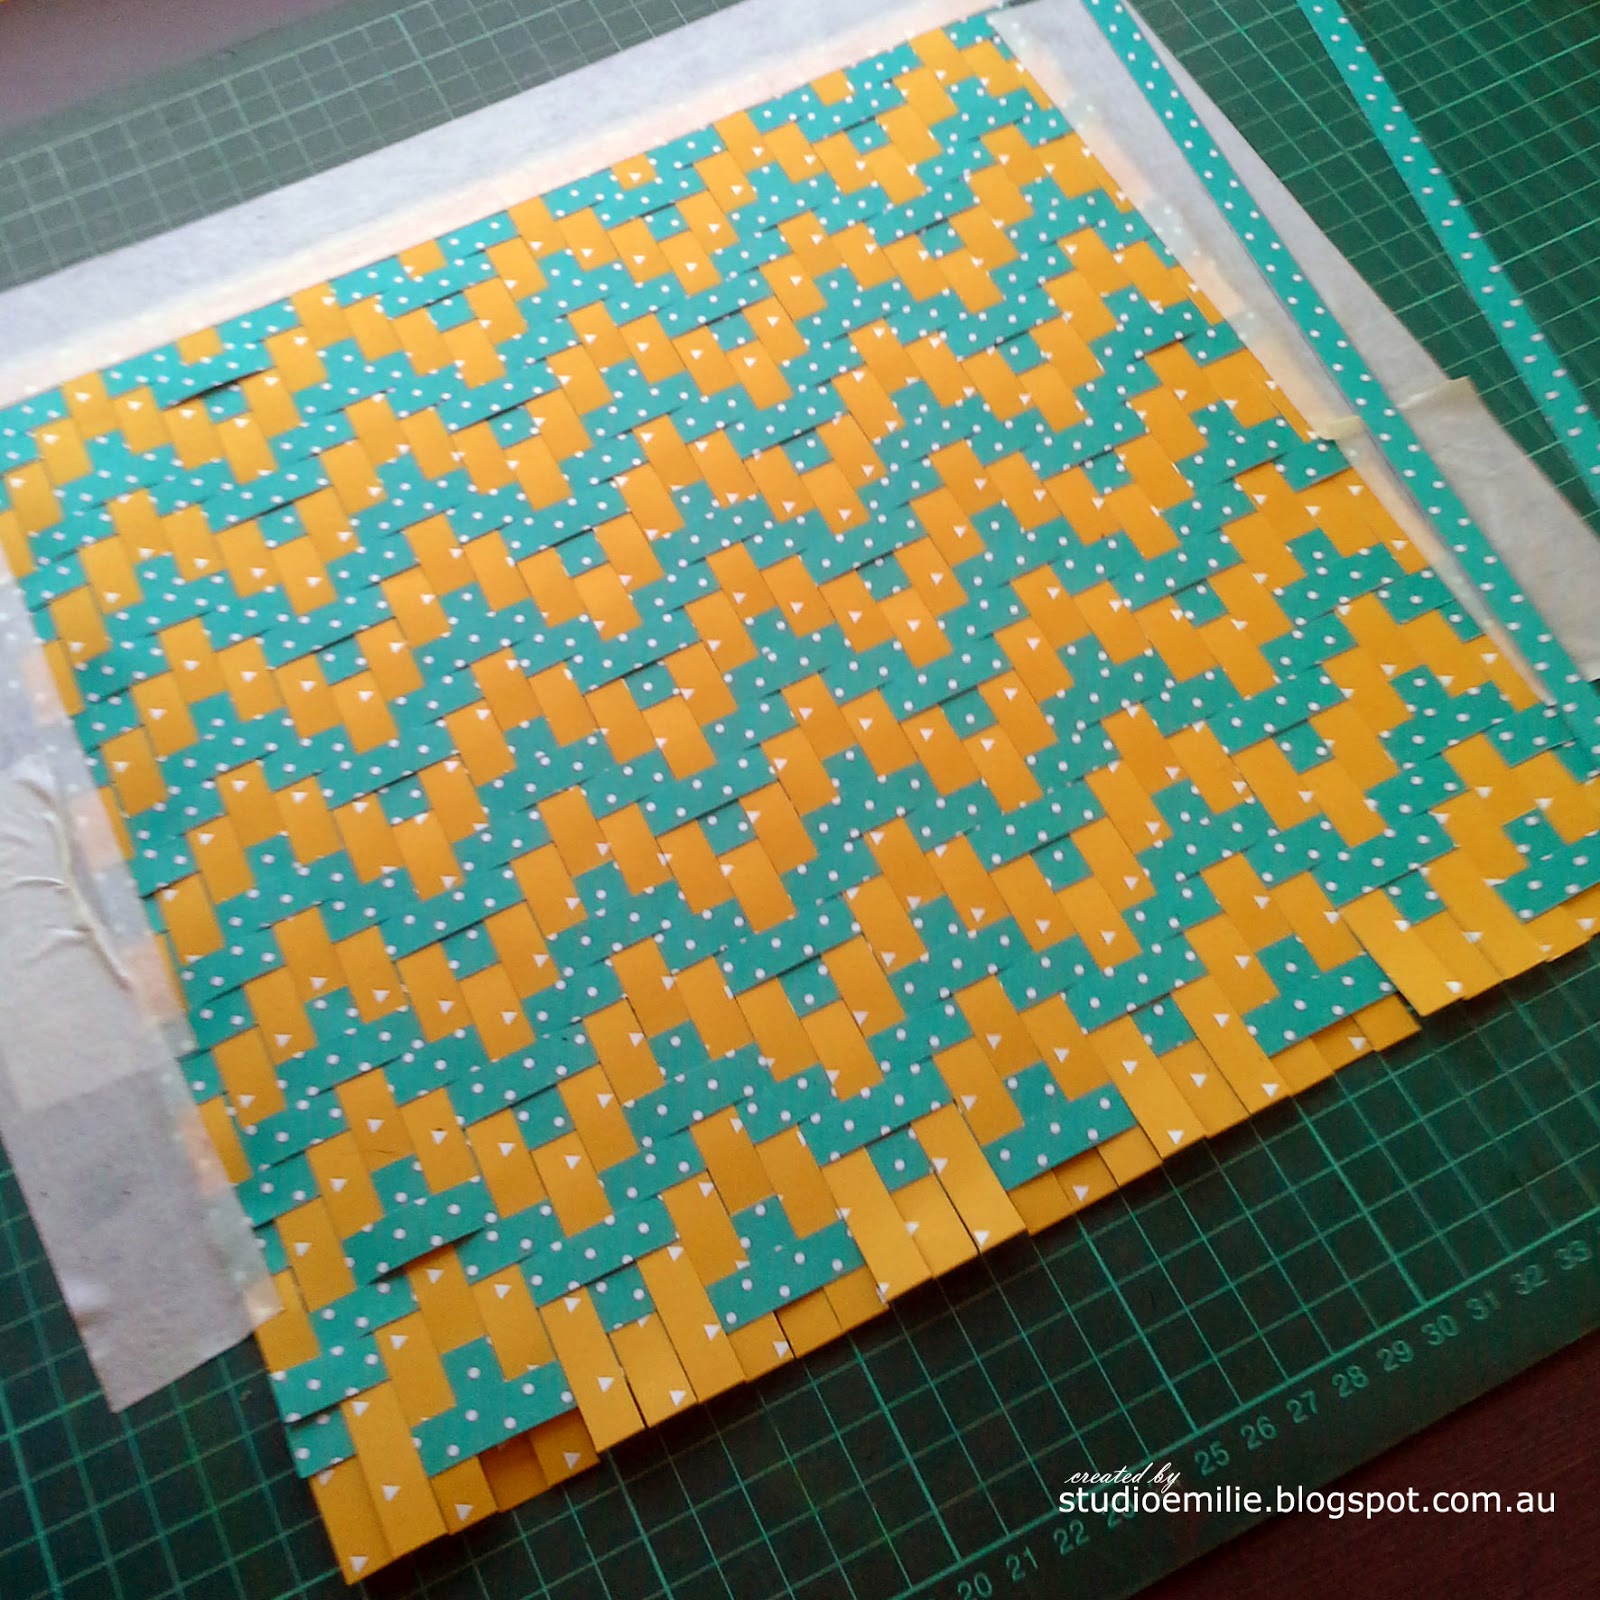
Following the pattern can be a little frustrating, and if you are anything like me, you will make mistakes. But its no big deal, you just pull out the strip and start again.
As you go along you may find that you want to run some masking tape over the sides of the finished sections so that they do not come undone.

You will not be able to weave right to the end of the paper. Stop with about 2 rows to spare.
Run masking tape around the entire project, covering about 1cm of the weaving on all sides.

Gently peel the masking tape off the craft mat, leaving it attached to the paper.

Flip the project over. Now you need to make sure your weaving won't come undone. Depending on what you want to use it for, you could either cover the back with adhesive and stick on another sheet of paper, or you can cover the back with masking tape.

Please note: masking tape is NOT photo safe, so adhering paper with an acid free adhesive is a better solution for scrapbooking or sentimental projects.
Now trim off all masking tape edges.

Notice that the edges of your weaving will be loose and could curl easily. You may choose to glue them down carefully, or to add a border frame to your project as I did with my card.

The weaving can be used as is, or cut down into smaller portions. My 12" sheet was cut down into 6 smaller pieces (14cm by 9cm) which I used to make cards.
I hope you have enjoyed this tutorial!
Love, Emilie
No comments:
Post a Comment